How to Train for Mount Roraima
You’ve signed up for the adventure of a lifetime—to trek to the tallest tepui in the world. Now it’s time to train for it!
This training guide will give you the strength, endurance, and confidence to conquer Mount Roraima, the tallest tepui in the world, and make every step of the journey unforgettable. Don’t forget to download the Training Guide PDF with your daily work out sets to keep you focused throughout the week!
ABOUT THE AUTHOR

NICOLE WALLACE
Biologist, Adventure Photographer
Head of Operations, Nicole is also a long distance backpacker, triathlete, and ultrarunner. Drawn to the grit and beauty of endurance sports, she enjoys pushing herself in challenging environments in the outdoors. Much of this article’s information comes from years of research and training for triathlons, marathons, and ultramarathons while remaining injury-free.
NAHUA EXPEDITIONS
3 Aug 2025 ・ 10 min read
If you’re reading this, chances are you’ve already signed up for the Mount Roraima Expedition—congratulations!
The difference between a trip that feels empowering and one that feels defeating can come down to how well you’ve prepared. While every expedition has its highs and lows, showing up physically ready will help you face the challenges with confidence—and enjoy the adventure even more.
In this article, we’ll go over a complete training routine for you to follow that will take you through targeted exercises that can be done 4-5 days per week with some additional training hikes. This training routine can be your go-to guide for building the strength, endurance, and resilience required to fully conquer the tepui.
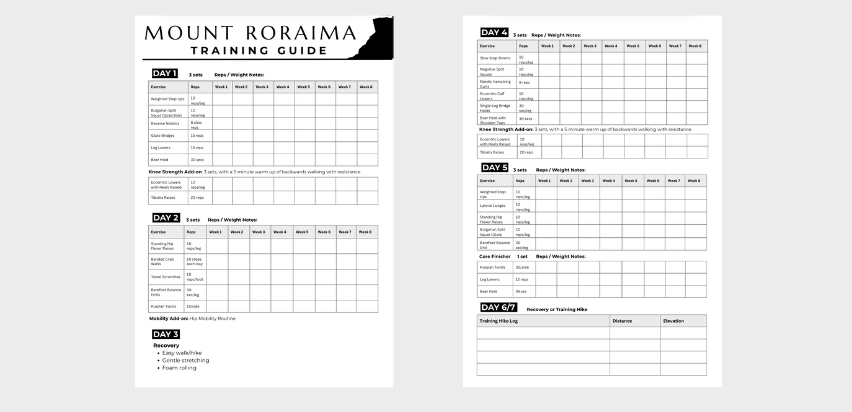
The downloadable PDF contains a week long workout routine using the exercises discussed in this article. For each week, there is space to write down notes on weight or repetitions for each exercise as you progress. Even if you don’t choose to alter weight or repetitions, the grid space is still a great way to check off your training progress.
How to Use the Printable Training Guide PDF
In this article, the exercises organized by muscle groups are listed below with linked resources to videos showing proper form and technique, but the Training Guide PDF is where the exercises all come together for a 7-day training plan.
The Training Guide PDF is designed to print out and bring with you to your gym or workout station. Once you have an understanding on how to perform each exercise using the linked resources in the Muscle Groups exercise section, follow along with the work outs in the PDF through out your training period.
- Printable, double-sided cheat sheet eliminates distractions from needing to reference your phone or other digital devices.
- Outlines the workout set for each day of the week.
- Chart to record notes on repetition and weight for each exercise.
- Chart to record the distance and elevation of your training hikes.
- Includes optional knee exercises to improve your knee health.
Expedition Overview
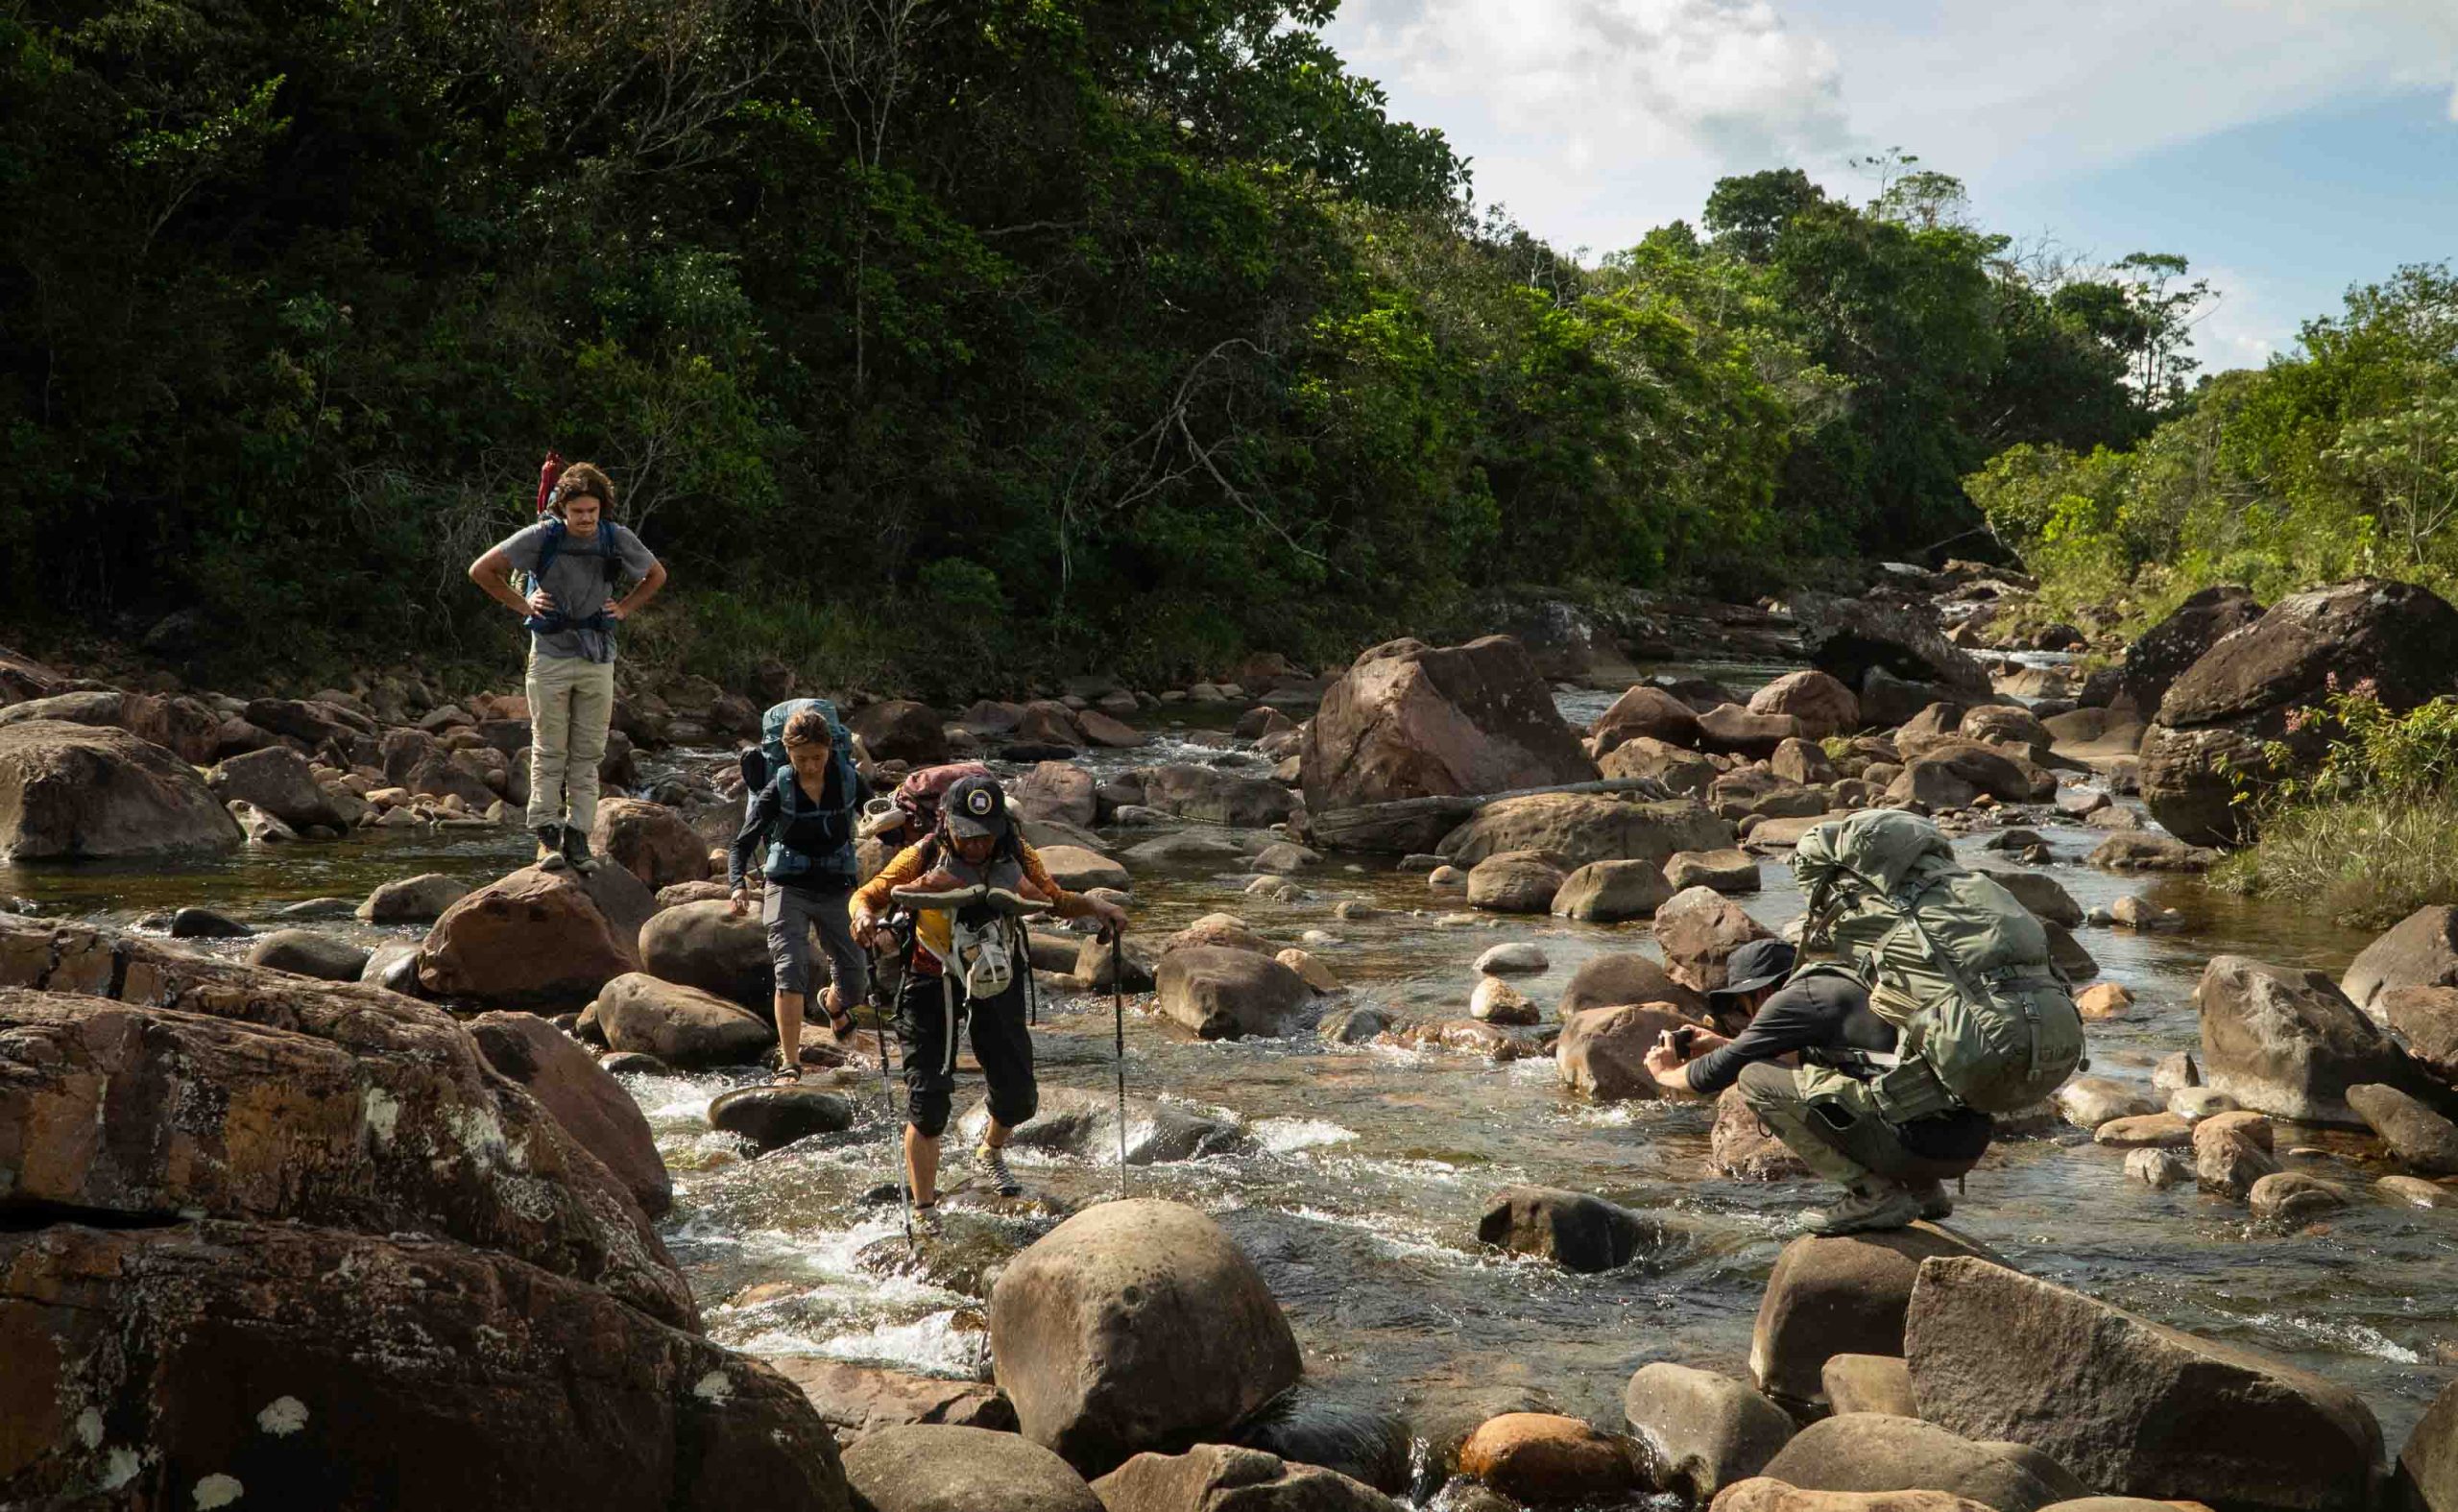
Our Roraima Expedition covers approximately 71 km (44 miles) of total hiking distance .
While the terrain on top of the tepui is mostly flat, reaching it—and descending afterward—involves significant elevation gain and loss: 1,600 meters (5,200 feet) both up, and down. The ascent and descent will be the most physically demanding parts of the journey, and require intentional training.
Here is a breakdown of our approximate hiking distances each day, with elevation change.
The Training Plan
The training plan is designed to build strength, balance, and endurance by targeting key muscle groups that you’ll be utilizing most on this expedition. These muscles help your body push efficiently uphill, maintain stability on the descent, and provide stability on uneven terrain.
MUSCLE GROUPS
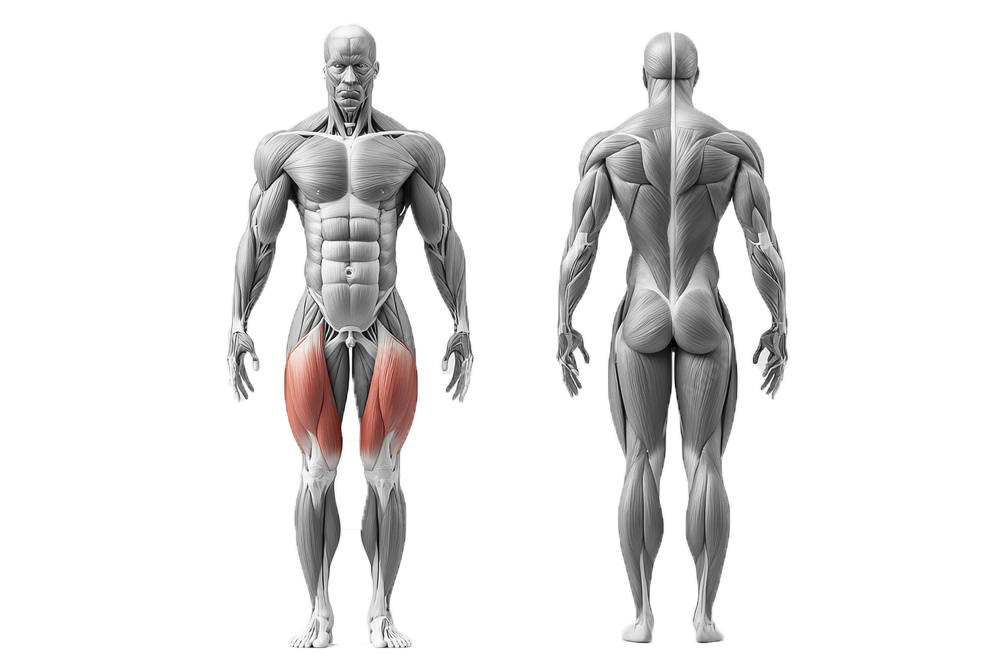
- The quadriceps (front of the thighs) are highly active, powering knee extension to lift your body with each step.
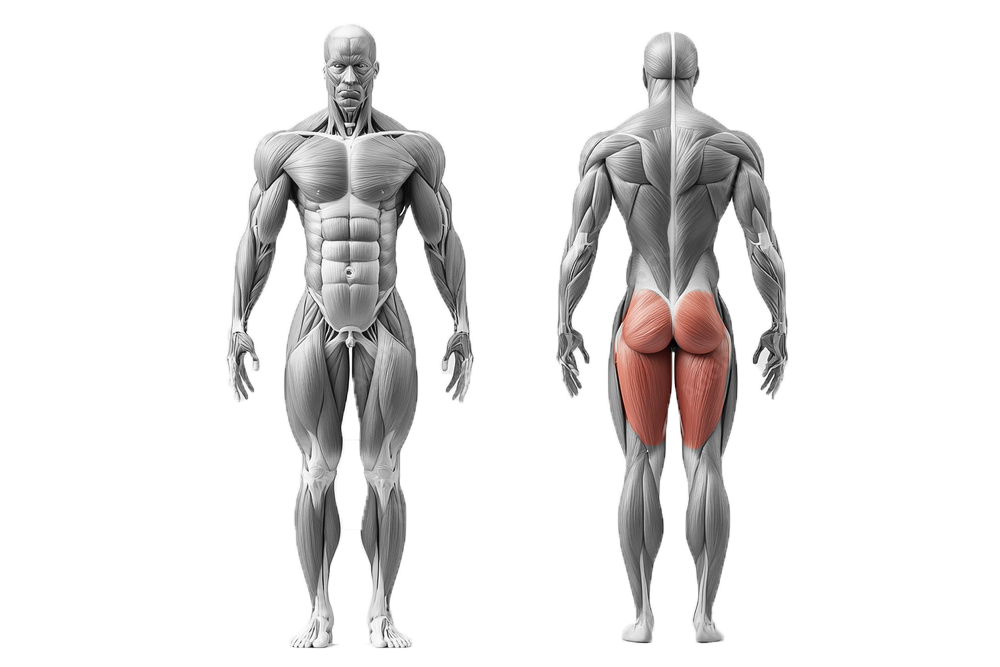
- The gluteal muscles and hamstrings help stabilize the hips and drive the body forward.
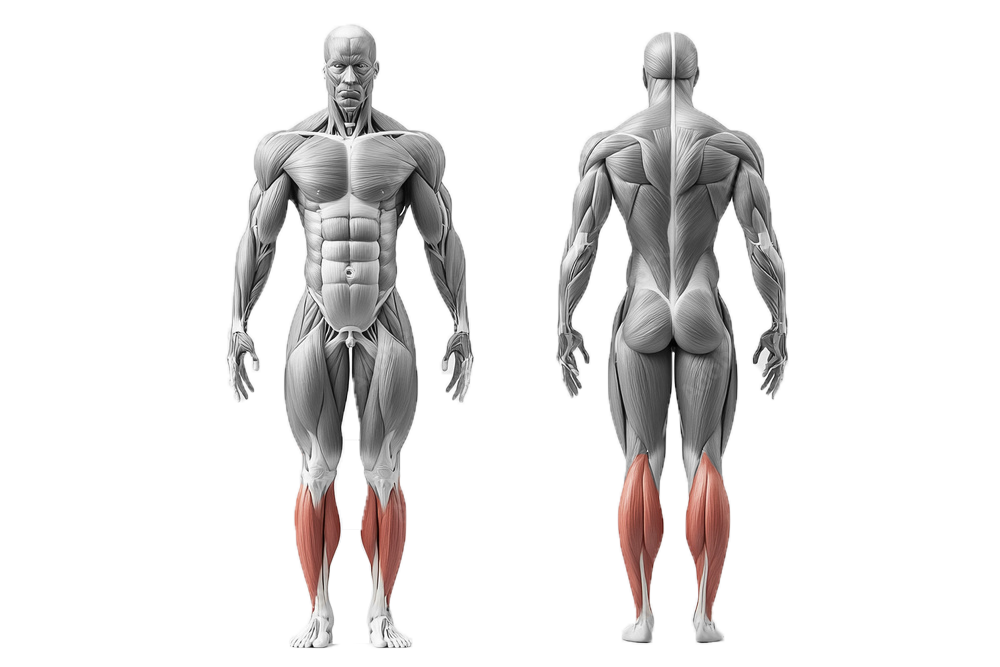
- The calves assist with push-off and help maintain balance on uneven terrain.
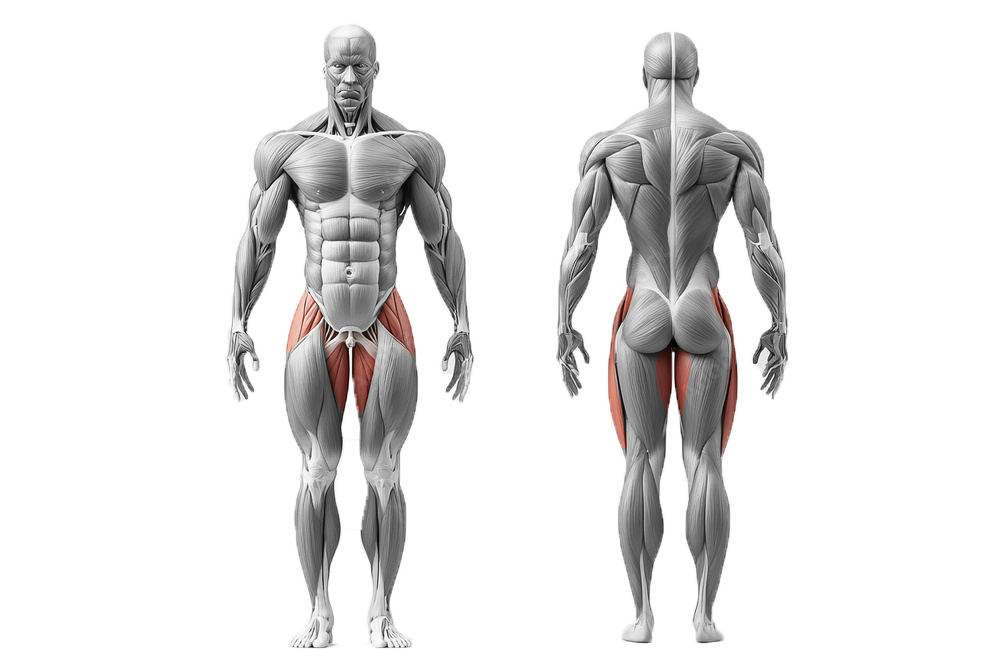
- The hip flexors work to lift the legs during each stride.
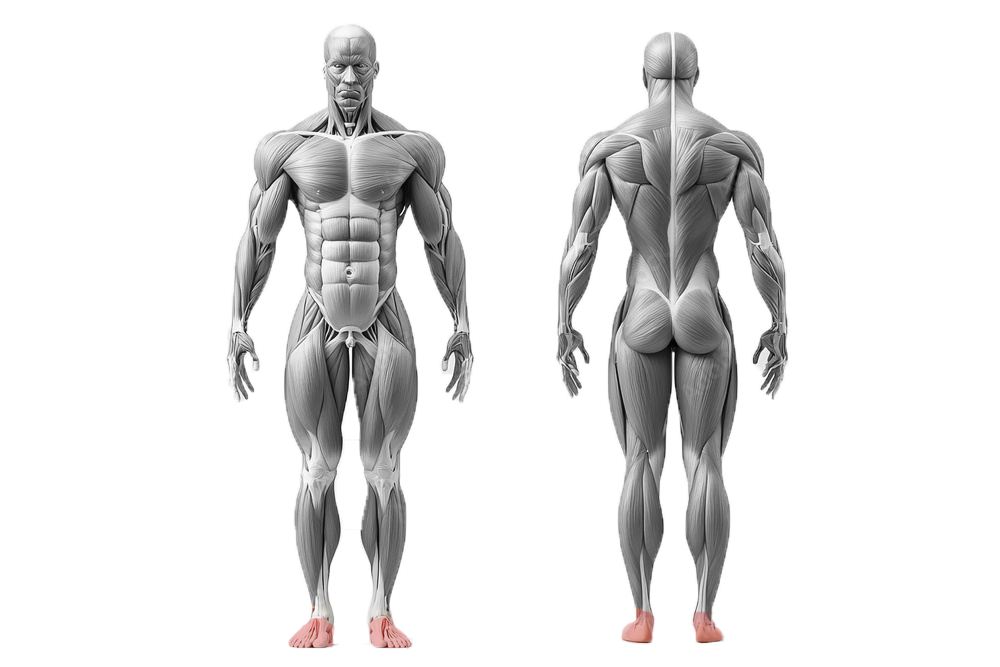
- The intrinsic foot muscles play a crucial role in maintaining balance and distributing bodyweight effectively—every step starts with how your foot connects to the ground.
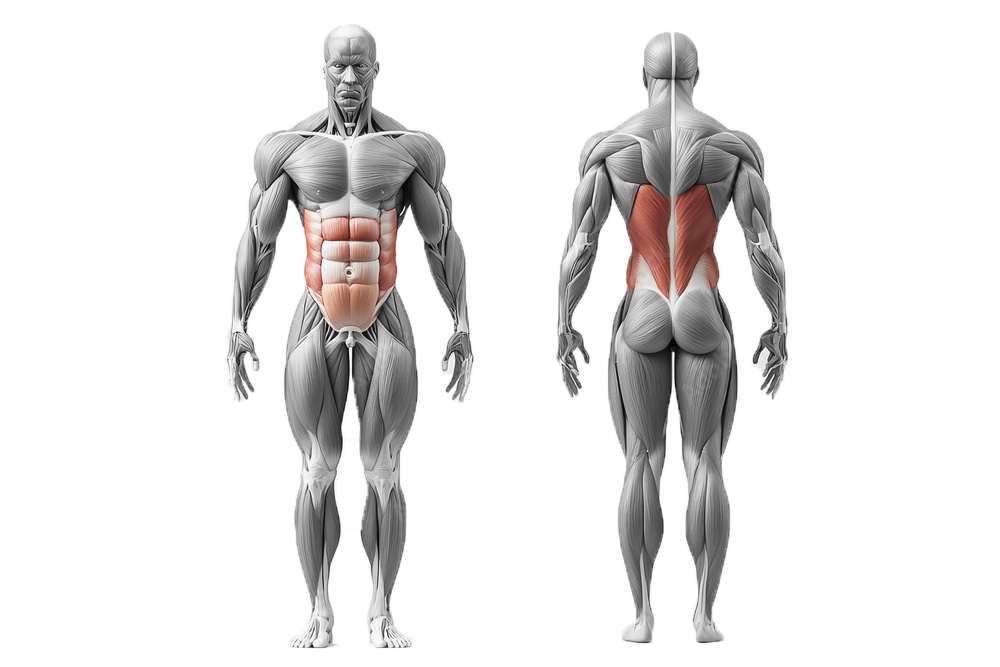
- Finally, the core muscles—including the abdominals and back—stabilize the torso and support the spine, especially when navigating technical terrain with a loaded pack.
Uphill (concentric) and downhill (eccentric) are two different training targets that can be accomplished based on different exercises. While many exercise movements can train both movements, how you perform each exercise—such as your tempo, range of motion, and form—will determine whether you’re building strength for the climb up or control for the hike down.
UPHILL VS. DOWNHILL
- Uphill movement primarily involves concentric contractions, where muscles shorten as they generate force—think of stepping up or lifting.
- Downhill movement emphasizes eccentric contractions, where muscles lengthen under load—like stepping down or lowering yourself to the ground.
The lower body and core must work harder to control and stabilize movement, especially when navigating steep or uneven descents. In fact, downhill hiking is often more taxing than climbing because of how the muscles absorb and resist force.
Eccentric contractions—particularly in the quadriceps—are mechanically demanding and place more strain on muscle fibers, increasing the likelihood of soreness or fatigue if your body hasn’t trained for it.
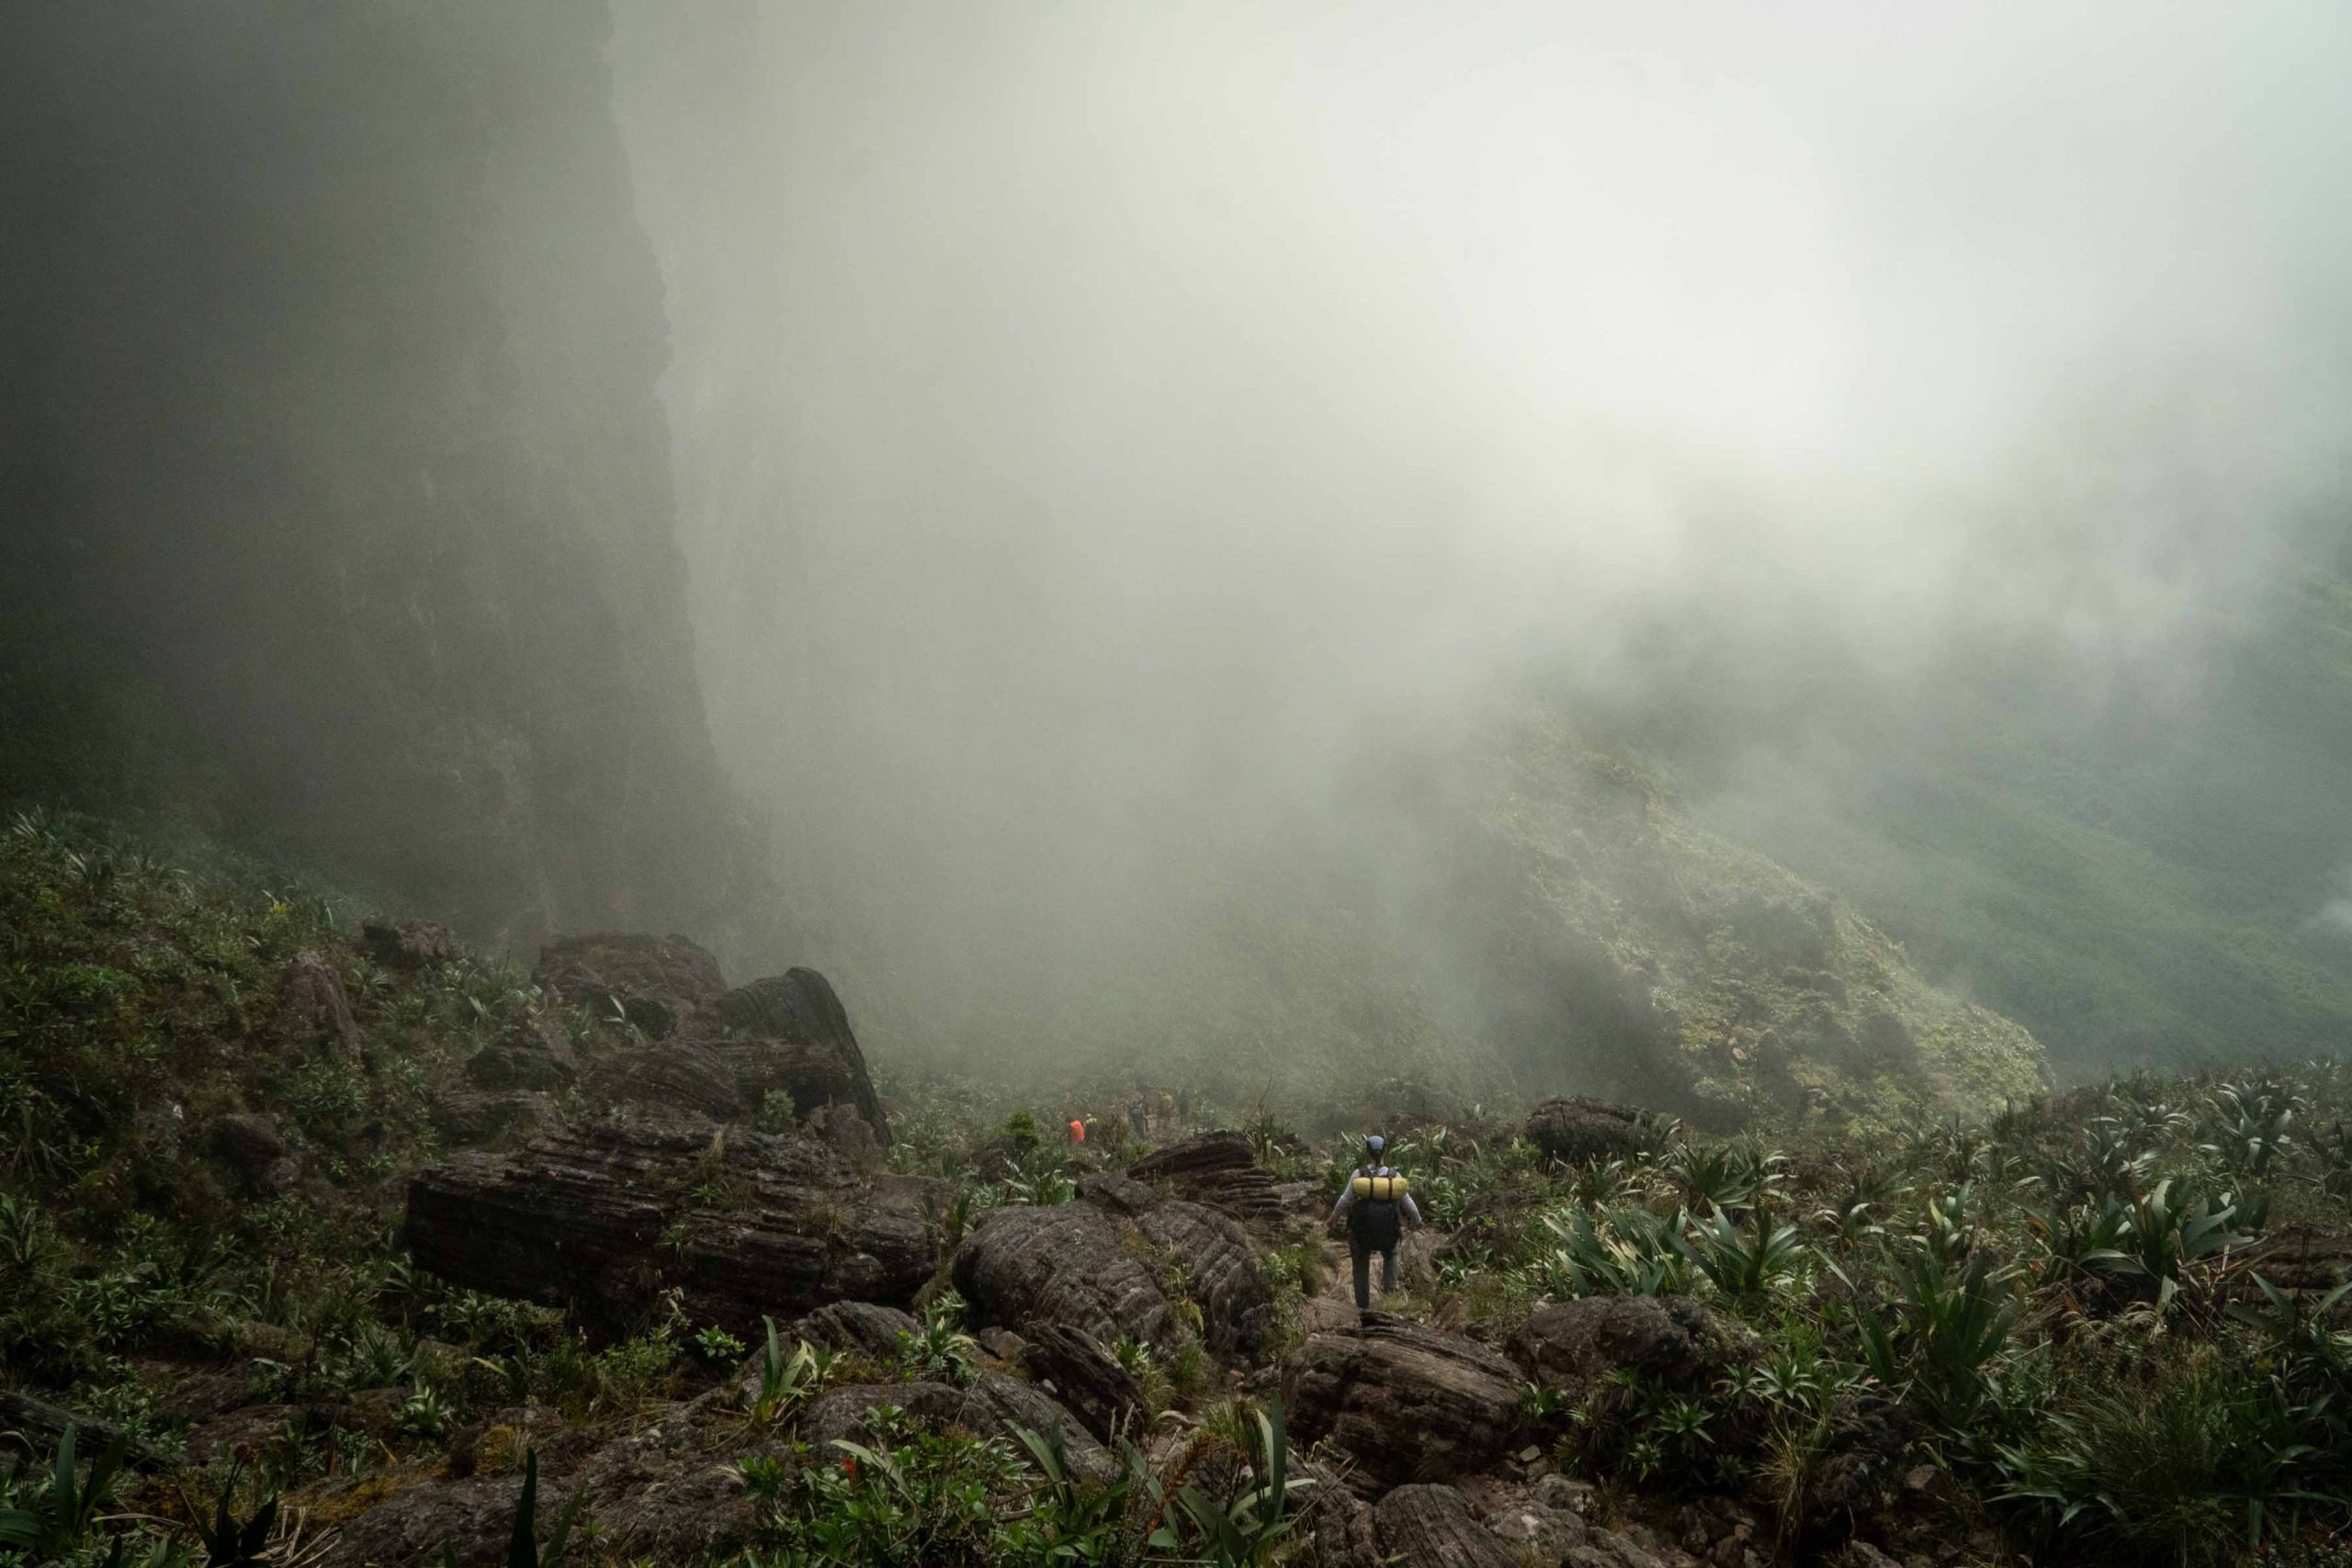
This is especially relevant on Day 10 of the expedition, when we descend from the tepui. While the route down is faster and completed in a single day (compared to two days on the ascent), it can be the most physically challenging day due to the sustained eccentric muscle work. Your body will thank you for putting in the time to prepare for this descent!
- Follow the linked videos to learn proper form before beginning the training guide. Each video also contains more information about how and why the exercise is effective.
- For optimal results, we recommend to begin training 6 to 8 weeks before your expedition. Start with minimal or no added weight—usually just your body weight—focusing on mastering proper form. As you become more comfortable, gradually add weight in small increments.
- Since this program emphasizes endurance over power, it’s better to increase the number of repetitions rather than the weight once you find a load that challenges you without excessive fatigue.
Note on Knee Health:
If you’ve experienced knee pain, weakness, or injury in the past, strengthening and conditioning your knees can make a huge difference in your ability to enjoy the expedition pain-free. All of the exercises below are excellent for improving knee stability, mobility, and strength—and they can easily be added to your weekly training routine.
If you are someone that would like to improve your knee health, aim to include these exercises twice per week, or more depending on your situation.
- Loaded Backwards Walking: This is one of the most effective low-impact, eccentric movements for strengthening the muscles around and inside the knee. You can do this on a treadmill or with a weighted sled; walking backwards on the treadmill provides just enough resistance to activate and strengthen the muscles around the knee. This is the perfect 5 minute warm up for your knees before starting a workout.
- Eccentric Lowers with Heel Raised: A variation of eccentric loading, this version elevates the heel to increase range of motion and load on the patellar tendon (and the plantar fascia). It can be modified to suit your comfort and ability level during rehabilitation or strength building.
- Tibialis Raises: Strengthening the tibialis anterior (the muscle along the front of your shin) helps reduce knee pain and protect against injury—especially during high-impact activities like hiking with a heavy pack or running. This exercise can be done seated if you have a contraption to load weight, or leaning back against a wall and lift your feet up to flex the tibialis anterior muscle. (This video also has a full strength training plan to rehabilitate your knees.)
The Training Plan Structure
To see the complete breakdown of the exercises for each day, download the Training Guide PDF. Once you have an understanding of how to properly perform each exercise with the information below, you will be ready to follow along with the Training Guide!
THE EXERCISES
Quadriceps
Why they matter: The quadriceps power your uphill steps and act like brakes on the descent, controlling your movement and absorbing impact—especially when carrying a pack.
Uphill Training (Concentric Strength)
- Weighted Step-Ups: Use a sturdy step, bench, or block. Focus on driving through the quad of your leading leg to lift your body up—avoid pushing off the back foot or leaning forward as you step.
- Bulgarian Split Squats (Quad-Biased): With your back foot elevated on a bench or chair, keep your torso upright to emphasize quad engagement. This video explains how posture affects whether you’re targeting your quads or glutes.
- Reverse Nordics: Start in a tall kneeling position. Engage your quads, glutes, and core as you slowly lean back, keeping hips extended. This isolates the quads without knee or hip flexion, building pure concentric quad strength.
Downhill Training (Eccentric Control)
- Slow Step-Downs: Stand on a step and slowly lower yourself down with control, using your lead leg to absorb the descent. Keep movements smooth and deliberate to build eccentric quad strength.
- Negative Split Squats: Elevate the heel of your back leg and place your front foot on an angled block. Slowly lower yourself down to mimic the mechanics of downhill hiking, emphasizing eccentric control through the front leg.
Glutes & Hamstrings
Why they matter: Your glutes and hamstrings provide the driving force behind each uphill step and play a key role in stabilizing your hips and knees on the descent. Strong, engaged posterior muscles help you maintain good posture and prevent fatigue-related compensation.
Uphill Training (Concentric Strength)
- Glute Bridges: A foundational glute activator that also engages the hips and core. Start with bodyweight, then add a dumbbell or barbell across your hips as you progress.
- Bulgarian Split Squats (Glute-Biased): With your back foot elevated, position your front foot slightly farther forward and lean your torso gently over your front thigh. This shifts the load into your glutes. This video shows how to adjust your form based on your training goal.
Downhill Training (Eccentric Control)
- Single-Leg Bridge Holds: A variation of the glute bridge that emphasizes the hamstrings through an isometric hold. Raise your toes to bias the hamstrings and build endurance and joint stability.
- Nordic Hamstring Curls: Kneel with your ankles anchored and slowly lean forward to engage your hamstrings eccentrically. These are challenging—use a resistance band or partner for support as you build strength and control.
hips
Why they matter: Hip strength is essential for balance, stride efficiency, and injury prevention. Properly engaging your hip flexors and surrounding muscles helps reduce strain on commonly overused areas—like the IT bands—by correcting movement patterns and stabilizing your gait.
Uphill Training (Concentric Strength & Mobility)
- Standing Hip Flexor Raises: Builds strength and stability in the hip flexors while improving balance. This movement also helps reinforce proper posture and leg lift for uphill hiking.
- Banded Crab Walks: Place a resistance band just above your knees and step sideways to activate the hip flexors and glutes. This is great for building lateral hip strength—often underdeveloped in linear activities like hiking.
- Hip Mobility Flow: Tight surrounding muscles can restrict the hips and limit strength. Regularly improving hip mobility helps unlock full range of motion and muscle recruitment.
Downhill Training (Eccentric Control & Balance)
- Lateral Lunges: Focuses on the hip adductors (inner thighs), which provide critical balance and control while descending on uneven terrain. Move slowly and with control to emphasize eccentric loading.
Calves
Why they matter: Your calves are crucial for both propelling you uphill and absorbing impact downhill. They stabilize the ankles, help maintain balance on uneven terrain, and play a major role in shock absorption—especially when hiking with a heavy pack.
Uphill Training (Concentric Strength)
- Single-Leg Calf Raises: Performed on a step or flat surface, this exercise builds calf strength, balance, and endurance. Focus on a full range of motion—pressing all the way up through the toes—and keep the movement slow and controlled.
Downhill Training (Eccentric Control)
- Eccentric Calf Drops: Begin by rising up on both feet, then slowly lower yourself down on one leg. This movement trains your calves to handle the lengthening load experienced when descending steep or rocky trails. The slower the lowering phase, the more effective the eccentric training. Aim for a 5-10 second descent.
Feet
Why they matter: Your feet are the foundation of every step you take. Strong, adaptable foot and ankle muscles provide essential stability, help maintain proper alignment throughout your legs, and reduce the risk of injury from overuse or uneven terrain. Foot strength also contributes to better
Unlike other muscle groups, foot and ankle training benefits both uphill and downhill hiking, so there’s no need to split these exercises by terrain. The following exercises target the small stabilizing muscles in your feet that often get overlooked.
- Barefoot Balance Drills: Stand barefoot, bend your knee slightly, hinge at the hips, lift your heels off the ground, and try closing your eyes. Without visual input, your feet must work overtime to help your body stay balanced. This challenges your nervous system and activates all the stabilizing muscles in your feet and ankles.
- Towel Scrunches: Place a small towel under your bare foot and use your toes to pull it toward you. Weak foot muscles can contribute to conditions like plantar fasciitis. This is a great low-impact way to reinforce your foot’s natural arch and prevent strain.
Core (Abs, Obliques, Lower Back)
Why they matter: Your core—comprising the upper and lower abdominals, obliques, and lower back muscles—serves as the central stabilizer for your entire body. It keeps your torso steady and supports your spine, especially when carrying a heavy backpack over uneven terrain. Like the Feet & Ankles, core training benefits both uphill and downhill hiking, so no need to split exercises by terrain.
- Bear Hold: A full-core engagement exercise that activates your abs, obliques, and lower back simultaneously. It also challenges your shoulder stability, which helps with overall body control while carrying a heavy pack.
- Leg Lowers: Focuses primarily on the lower abdominal muscles, which are key for pelvic stability and controlling hip movement during hiking.
- Russian Twists with Weight: This exercise develops rotational strength and control, important for maintaining balance and adjusting your posture on uneven terrain while carrying a pack.
Training Hikes
Days 6 and 7 of the training plan are designated as rest days to help you balance training with your busy lifestyle. While taking these days off is good for recovery, using this time to go for a training hike at least once during the training block can significantly boost your fitness and preparation for Roraima.
Since the Mount Roraima Expedition involves technical terrain, training on rough or steep trails will help your body adapt to the demands you’ll face. Ideally, plan at least one hike or overnight backpacking trip with a heavy pack before the expedition. This is also a perfect chance to test your gear, nutrition, and packing list—making sure everything feels comfortable and works well for the conditions ahead.
Final Thoughts
Now that we have gone over all of the essential exercises for building strength, balance, and endurance, you now know how to prepare the Mount Roraima Expedition.
While following the plan perfectly would be ideal, remember that nobody is perfect; what truly matters is showing up and doing what you can. Training for the Mount Roraima Expedition isn’t just about building strength and endurance—it’s about preparing your body and mind for one of the most incredible adventures you’ll ever experience. The effort you put into your training will pay off on the trail, allowing you to move with confidence, enjoy the breathtaking landscapes, and create memories that will last a lifetime.
This training guide isn’t meant to intimidate you—it’s here to help you feel prepared and confident. All of our trips are designed to be accessible, even if you have minimal training or outdoor experience. The most important thing you can bring is a willingness to push yourself outside your comfort zone—and a great attitude to enjoy every moment along the way. Get ready to challenge yourself, grow stronger, and celebrate an achievement that few get to experience.
What's Next?
If you’re already signed up for our Mount Roraima Expedition—amazing! We can’t wait to share this unforgettable adventure with you. If you’re still considering this trip or exploring other options, take a look at the other expeditions we have planned.
How to Train for Mount Roraima
You’ve signed up for the adventure of a lifetime—to trek to the tallest tepui in the world. Now it’s time to train for it!
This guide will give you the strength, endurance, and confidence to conquer Mount Roraima, the tallest tepui in the world, and make every step of the journey unforgettable. Don’t forget to download the Training Guide PDF with your daily work out sets to keep you focused throughout the week!
3 AUG 2025 ・ 10 min read
Nahua Expeditions
If you’re reading this, chances are you’ve already signed up for the Mount Roraima Expedition—congratulations!
The difference between a trip that feels empowering and one that feels defeating can come down to how well you’ve prepared. While every expedition has its highs and lows, showing up physically ready will help you face the challenges with confidence—and enjoy the adventure even more.
In this article, we’ll go over a complete training routine for you to follow that will take you through targeted exercises that can be done 4-5 days per week with some additional training hikes. This training routine can be your go-to guide for building the strength, endurance, and resilience required to fully conquer the tepui.
The downloadable PDF contains a week long workout routine using the exercises discussed in this article. For each week, there is space to write down notes on weight or repetitions for each exercise as you progress. Even if you don’t choose to alter weight or repetitions, the grid space is still a great way to check off your training progress.
How to Use the Printable Training Guide PDF
In this article, the exercises organized by muscle groups are listed below with linked resources to videos showing proper form and technique, but the Training Guide PDF is where the exercises all come together for a 7-day training plan.
The Training Guide PDF is designed to be printed out and bring with you to your gym or workout station. Once you have an understanding on how to perform each exercise using the linked resources in the Muscle Groups exercise section, this Training Guide PDF is a simple reference sheet to keep you focused through out your training period.
- Printable, double-sided cheat sheet eliminates distractions from needing to reference your phone or other digital devices.
- Outlines the workout set for each day of the week.
- Chart to record notes on repetition and weight for each exercise.
- Chart to record the distance and elevation of your training hikes.
- Includes optional knee exercises to improve your knee health.
Expedition Overview
Our Roraima Expedition covers approximately 71 km (44 miles) of total hiking distance .
While the terrain on top of the tepui is mostly flat, reaching it—and descending afterward—involves significant elevation gain and loss: 1,600 meters (5,200 feet) both up, and down. The ascent and descent will be the most physically demanding parts of the journey, and require intentional training.
Here is a breakdown of our approximate hiking distances each day, with elevation change.
The Training Plan
The training plan is designed to build strength, balance, and endurance by targeting key muscle groups that you’ll be utilizing most on this expedition. These muscles help your body push efficiently uphill, maintain stability on the descent, and provide stability on uneven terrain.
MUSCLE GROUPS
- The quadriceps (front of the thighs) are highly active, powering knee extension to lift your body with each step.
- The gluteal muscles and hamstrings help stabilize the hips and drive the body forward.
- The calves assist with push-off and help maintain balance on uneven terrain.
- The hip flexors work to lift the legs during each stride.
- The intrinsic foot muscles play a crucial role in maintaining balance and distributing bodyweight effectively—every step starts with how your foot connects to the ground.
- Finally, the core muscles—including the abdominals and back—stabilize the torso and support the spine, especially when navigating technical terrain with a loaded pack.
Uphill (concentric) and downhill (eccentric) are two different training targets that can be accomplished with different exercises. While many exercise movements can train both movements, how you perform each exercise—such as your tempo, range of motion, and form—will determine whether you’re building strength for the climb up or control for the hike down.
UPHILL VS. DOWNHILL
- Uphill movement primarily involves concentric contractions, where muscles shorten as they generate force—think of stepping up or lifting.
- Downhill movement emphasizes eccentric contractions, where muscles lengthen under load—like stepping down or lowering yourself to the ground.
The lower body and core must work harder to control and stabilize movement, especially when navigating steep or uneven descents. In fact, downhill hiking is often more taxing than climbing because of how the muscles absorb and resist force.
Eccentric contractions—particularly in the quadriceps—are mechanically demanding and place more strain on muscle fibers, increasing the likelihood of soreness or fatigue if your body hasn’t trained for it.
This is especially relevant on Day 10 of the expedition, when we descend from the tepui. While the route down is faster and completed in a single day (compared to two days on the ascent), it can be the most physically challenging day due to the sustained eccentric muscle work. Your body will thank you for putting in the time to prepare for this descent!
- Follow the linked videos to learn proper form before beginning the training guide. Each video also contains more information about how and why the exercise is effective.
- For optimal results, we recommend to begin training 6 to 8 weeks before your expedition. Start with minimal or no added weight—usually just your body weight—focusing on mastering proper form. As you become more comfortable, gradually add weight in small increments.
- Since this program emphasizes endurance over power, it’s better to increase the number of repetitions rather than the weight once you find a load that challenges you without excessive fatigue.
Note on Knee Health:
If you’ve experienced knee pain, weakness, or injury in the past, strengthening and conditioning your knees can make a huge difference in your ability to enjoy the expedition pain-free. All of the exercises below are excellent for improving knee stability, mobility, and strength—and they can easily be added to your weekly training routine.
If you are someone that would like to improve your knee health, aim to include these exercises twice per week, or more depending on your situation.
- Loaded Backwards Walking: This is one of the most effective low-impact, eccentric movements for strengthening the muscles around and inside the knee. You can do this on a treadmill or with a weighted sled; walking backwards on the treadmill provides just enough resistance to activate and strengthen the muscles around the knee. This is the perfect 5 minute warm up for your knees before starting a workout.
- Eccentric Lowers with Heel Raised: A variation of eccentric loading, this version elevates the heel to increase range of motion and load on the patellar tendon (and the plantar fascia). It can be modified to suit your comfort and ability level during rehabilitation or strength building.
- Tibialis Raises: Strengthening the tibialis anterior (the muscle along the front of your shin) helps reduce knee pain and protect against injury—especially during high-impact activities like hiking with a heavy pack or running. This exercise can be done seated if you have a contraption to load weight, or leaning back against a wall and lift your feet up to flex the tibialis anterior muscle. (This video also has a full strength training plan to rehabilitate your knees.)
The Training Plan Structure
To see the complete breakdown of the exercises for each day, download the Training Guide PDF. Once you have an understanding of how to properly perform each exercise with the information below, you will be ready to follow along with the Training Guide!
THE EXERCISES
Quadriceps
Why they matter: The quadriceps power your uphill steps and act like brakes on the descent, controlling your movement and absorbing impact—especially when carrying a pack.
Uphill Training (Concentric Strength)
- Weighted Step-Ups: Use a sturdy step, bench, or block. Focus on driving through the quad of your leading leg to lift your body up—avoid pushing off the back foot or leaning forward as you step.
- Bulgarian Split Squats (Quad-Biased): With your back foot elevated on a bench or chair, keep your torso upright to emphasize quad engagement. This video explains how posture affects whether you’re targeting your quads or glutes.
- Reverse Nordics: Start in a tall kneeling position. Engage your quads, glutes, and core as you slowly lean back, keeping hips extended. This isolates the quads without knee or hip flexion, building pure concentric quad strength.
Downhill Training (Eccentric Control)
- Slow Step-Downs: Stand on a step and slowly lower yourself down with control, using your lead leg to absorb the descent. Keep movements smooth and deliberate to build eccentric quad strength.
- Negative Split Squats: Elevate the heel of your back leg and place your front foot on an angled block. Slowly lower yourself down to mimic the mechanics of downhill hiking, emphasizing eccentric control through the front leg.
Glutes & Hamstrings
Why they matter: Your glutes and hamstrings provide the driving force behind each uphill step and play a key role in stabilizing your hips and knees on the descent. Strong, engaged posterior muscles help you maintain good posture and prevent fatigue-related compensation.
Uphill Training (Concentric Strength)
- Glute Bridges: A foundational glute activator that also engages the hips and core. Start with bodyweight, then add a dumbbell or barbell across your hips as you progress.
- Bulgarian Split Squats (Glute-Biased): With your back foot elevated, position your front foot slightly farther forward and lean your torso gently over your front thigh. This shifts the load into your glutes. This video shows how to adjust your form based on your training goal.
Downhill Training (Eccentric Control)
- Single-Leg Bridge Holds: A variation of the glute bridge that emphasizes the hamstrings through an isometric hold. Raise your toes to bias the hamstrings and build endurance and joint stability.
- Nordic Hamstring Curls: Kneel with your ankles anchored and slowly lean forward to engage your hamstrings eccentrically. These are challenging—use a resistance band or partner for support as you build strength and control.
Hips
Why they matter: Hip strength is essential for balance, stride efficiency, and injury prevention. Properly engaging your hip flexors and surrounding muscles helps reduce strain on commonly overused areas—like the IT bands—by correcting movement patterns and stabilizing your gait.
Uphill Training (Concentric Strength & Mobility)
- Standing Hip Flexor Raises: Builds strength and stability in the hip flexors while improving balance. This movement also helps reinforce proper posture and leg lift for uphill hiking.
- Banded Crab Walks: Place a resistance band just above your knees and step sideways to activate the hip flexors and glutes. This is great for building lateral hip strength—often underdeveloped in linear activities like hiking.
- Hip Mobility Flow: Tight surrounding muscles can restrict the hips and limit strength. Regularly improving hip mobility helps unlock full range of motion and muscle recruitment.
Downhill Training (Eccentric Control & Balance)
- Lateral Lunges: Focuses on the hip adductors (inner thighs), which provide critical balance and control while descending on uneven terrain. Move slowly and with control to emphasize eccentric loading.
Calves
Why they matter: Your calves are crucial for both propelling you uphill and absorbing impact downhill. They stabilize the ankles, help maintain balance on uneven terrain, and play a major role in shock absorption—especially when hiking with a heavy pack.
Uphill Training (Concentric Strength)
- Single-Leg Calf Raises: Performed on a step or flat surface, this exercise builds calf strength, balance, and endurance. Focus on a full range of motion—pressing all the way up through the toes—and keep the movement slow and controlled.
Downhill Training (Eccentric Control)
- Eccentric Calf Drops: Begin by rising up on both feet, then slowly lower yourself down on one leg. This movement trains your calves to handle the lengthening load experienced when descending steep or rocky trails. The slower the lowering phase, the more effective the eccentric training. Aim for a 5-10 second descent.
Feet
Why they matter: Your feet are the foundation of every step you take. Strong, adaptable foot and ankle muscles provide essential stability, help maintain proper alignment throughout your legs, and reduce the risk of injury from overuse or uneven terrain. Foot strength also contributes to better
Unlike other muscle groups, foot and ankle training benefits both uphill and downhill hiking, so there’s no need to split these exercises by terrain. The following exercises target the small stabilizing muscles in your feet that often get overlooked.
- Barefoot Balance Drills: Stand barefoot, bend your knee slightly, hinge at the hips, lift your heels off the ground, and try closing your eyes. Without visual input, your feet must work overtime to help your body stay balanced. This challenges your nervous system and activates all the stabilizing muscles in your feet and ankles.
- Towel Scrunches: Place a small towel under your bare foot and use your toes to pull it toward you. Weak foot muscles can contribute to conditions like plantar fasciitis. This is a great low-impact way to reinforce your foot’s natural arch and prevent strain.
Core
Why they matter: Your core—comprising the upper and lower abdominals, obliques, and lower back muscles—serves as the central stabilizer for your entire body. It keeps your torso steady and supports your spine, especially when carrying a heavy backpack over uneven terrain. Like the Feet & Ankles, core training benefits both uphill and downhill hiking, so no need to split exercises by terrain.
- Bear Hold: A full-core engagement exercise that activates your abs, obliques, and lower back simultaneously. It also challenges your shoulder stability, which helps with overall body control while carrying a heavy pack.
- Leg Lowers: Focuses primarily on the lower abdominal muscles, which are key for pelvic stability and controlling hip movement during hiking.
- Russian Twists with Weight: This exercise develops rotational strength and control, important for maintaining balance and adjusting your posture on uneven terrain while carrying a pack.
Training Hikes
Days 6 and 7 of the training plan are designated as rest days to help you balance training with your busy lifestyle. While taking these days off is good for recovery, using this time to go for a training hike at least once during the training block can significantly boost your fitness and preparation for Roraima.
Since the Mount Roraima Expedition involves technical terrain, training on rough or steep trails will help your body adapt to the demands you’ll face. Ideally, plan at least one hike or overnight backpacking trip with a heavy pack before the expedition. This is also a perfect chance to test your gear, nutrition, and packing list—making sure everything feels comfortable and works well for the conditions ahead.
Final Thoughts
Now that we have gone over all of the essential exercises for building strength, balance, and endurance, you now know how to prepare the Mount Roraima Expedition.
While following the plan perfectly would be ideal, remember that nobody is perfect; what truly matters is showing up and doing what you can. Training for the Mount Roraima Expedition isn’t just about building strength and endurance—it’s about preparing your body and mind for one of the most incredible adventures you’ll ever experience. The effort you put into your training will pay off on the trail, allowing you to move with confidence, enjoy the breathtaking landscapes, and create memories that will last a lifetime.
This training guide isn’t meant to intimidate you—it’s here to help you feel prepared and confident. All of our trips are designed to be accessible, even if you have minimal training or outdoor experience. The most important thing you can bring is a willingness to push yourself outside your comfort zone—and a great attitude to enjoy every moment along the way. Get ready to challenge yourself, grow stronger, and celebrate an achievement that few get to experience.
What's Next?
If you’re already signed up for our Mount Roraima Expedition—amazing! We can’t wait to share this unforgettable adventure with you. If you’re still considering this trip or exploring other options, take a look at the other expeditions we have planned.
ABOUT THE AUTHOR

Nicole Wallace
Biologist, Adventure Photographer
Head of Operations, Nicole is also a long distance backpacker, triathlete, and ultrarunner. Drawn to the grit and beauty of endurance sports, she enjoys pushing herself in challenging environments in the outdoors. Much of this article’s information comes from years of research and training for triathlons, marathons, and ultramarathons while remaining injury-free.

